
Orbit Base User Guide
Connectivity
The Orbit Base is designed for simplicity. All power and data transmission for RTK operation is handled through a single USB-C port.
| Port | Function |
|---|---|
| USB-C | Power (5V) and Data (RTCM3 output) |
| SMA | Connection for external GNSS Antenna |
LED Indicators
The Orbit Base has a set of LEDs to provide clear visual feedback on its operational status.
| LED | Color | Status | Meaning |
|---|---|---|---|
| Power | Green | Solid On | The device is powered on |
| GPS Lock | Blue | Blinking | 3D GPS lock achieved |
Hardware Setup
Proper hardware setup is critical for achieving a stable and accurate RTK lock.
- Mount the Antenna: Securely mount the GNSS antenna on a stable, elevated platform, such as a survey tripod.
- Ensure Clear Sky View: The antenna must have a 360-degree, unobstructed view of the sky. Place it away from buildings, trees, power lines, or other sources of radio interference. Using the included ground plane under the antenna is highly recommended to reduce multipath interference.
- Connect Antenna: Screw the antenna cable into the SMA connector on the Orbit Base unit until it is finger-tight.
Software Setup with Mission Planner
This guide explains how to use the Orbit Base to provide RTK corrections to a vehicle via Mission Planner.
Step 1: Connect to Computer
- Use the provided USB-C cable to connect the Orbit Base to a USB port on your computer running Mission Planner.
- The device will power on, and the Green Power LED will illuminate. Windows should automatically detect it and assign it a COM port.
Step 2: Identify the COM Port
- In Windows: Open the Device Manager, expand the Ports (COM & LPT) section, and look for the “u-blox GNSS Receiver” or a similar name. Note the COM port number (e.g., COM4).
Step 3: Configure Mission Planner
- Open Mission Planner, but do not connect to your vehicle yet.
- On the top-right of the screen, ensure the connection method is set to AUTO or TCP/UDP.
- Go to the Initial Setup screen (or press
Ctrl+F) and select RTK/GPS Inject. - You will see the
Basesection on the left. In the dropdown menu, select the COM port that your computer assigned to the Orbit Base. - Click the Connect button located within the
Basesection.
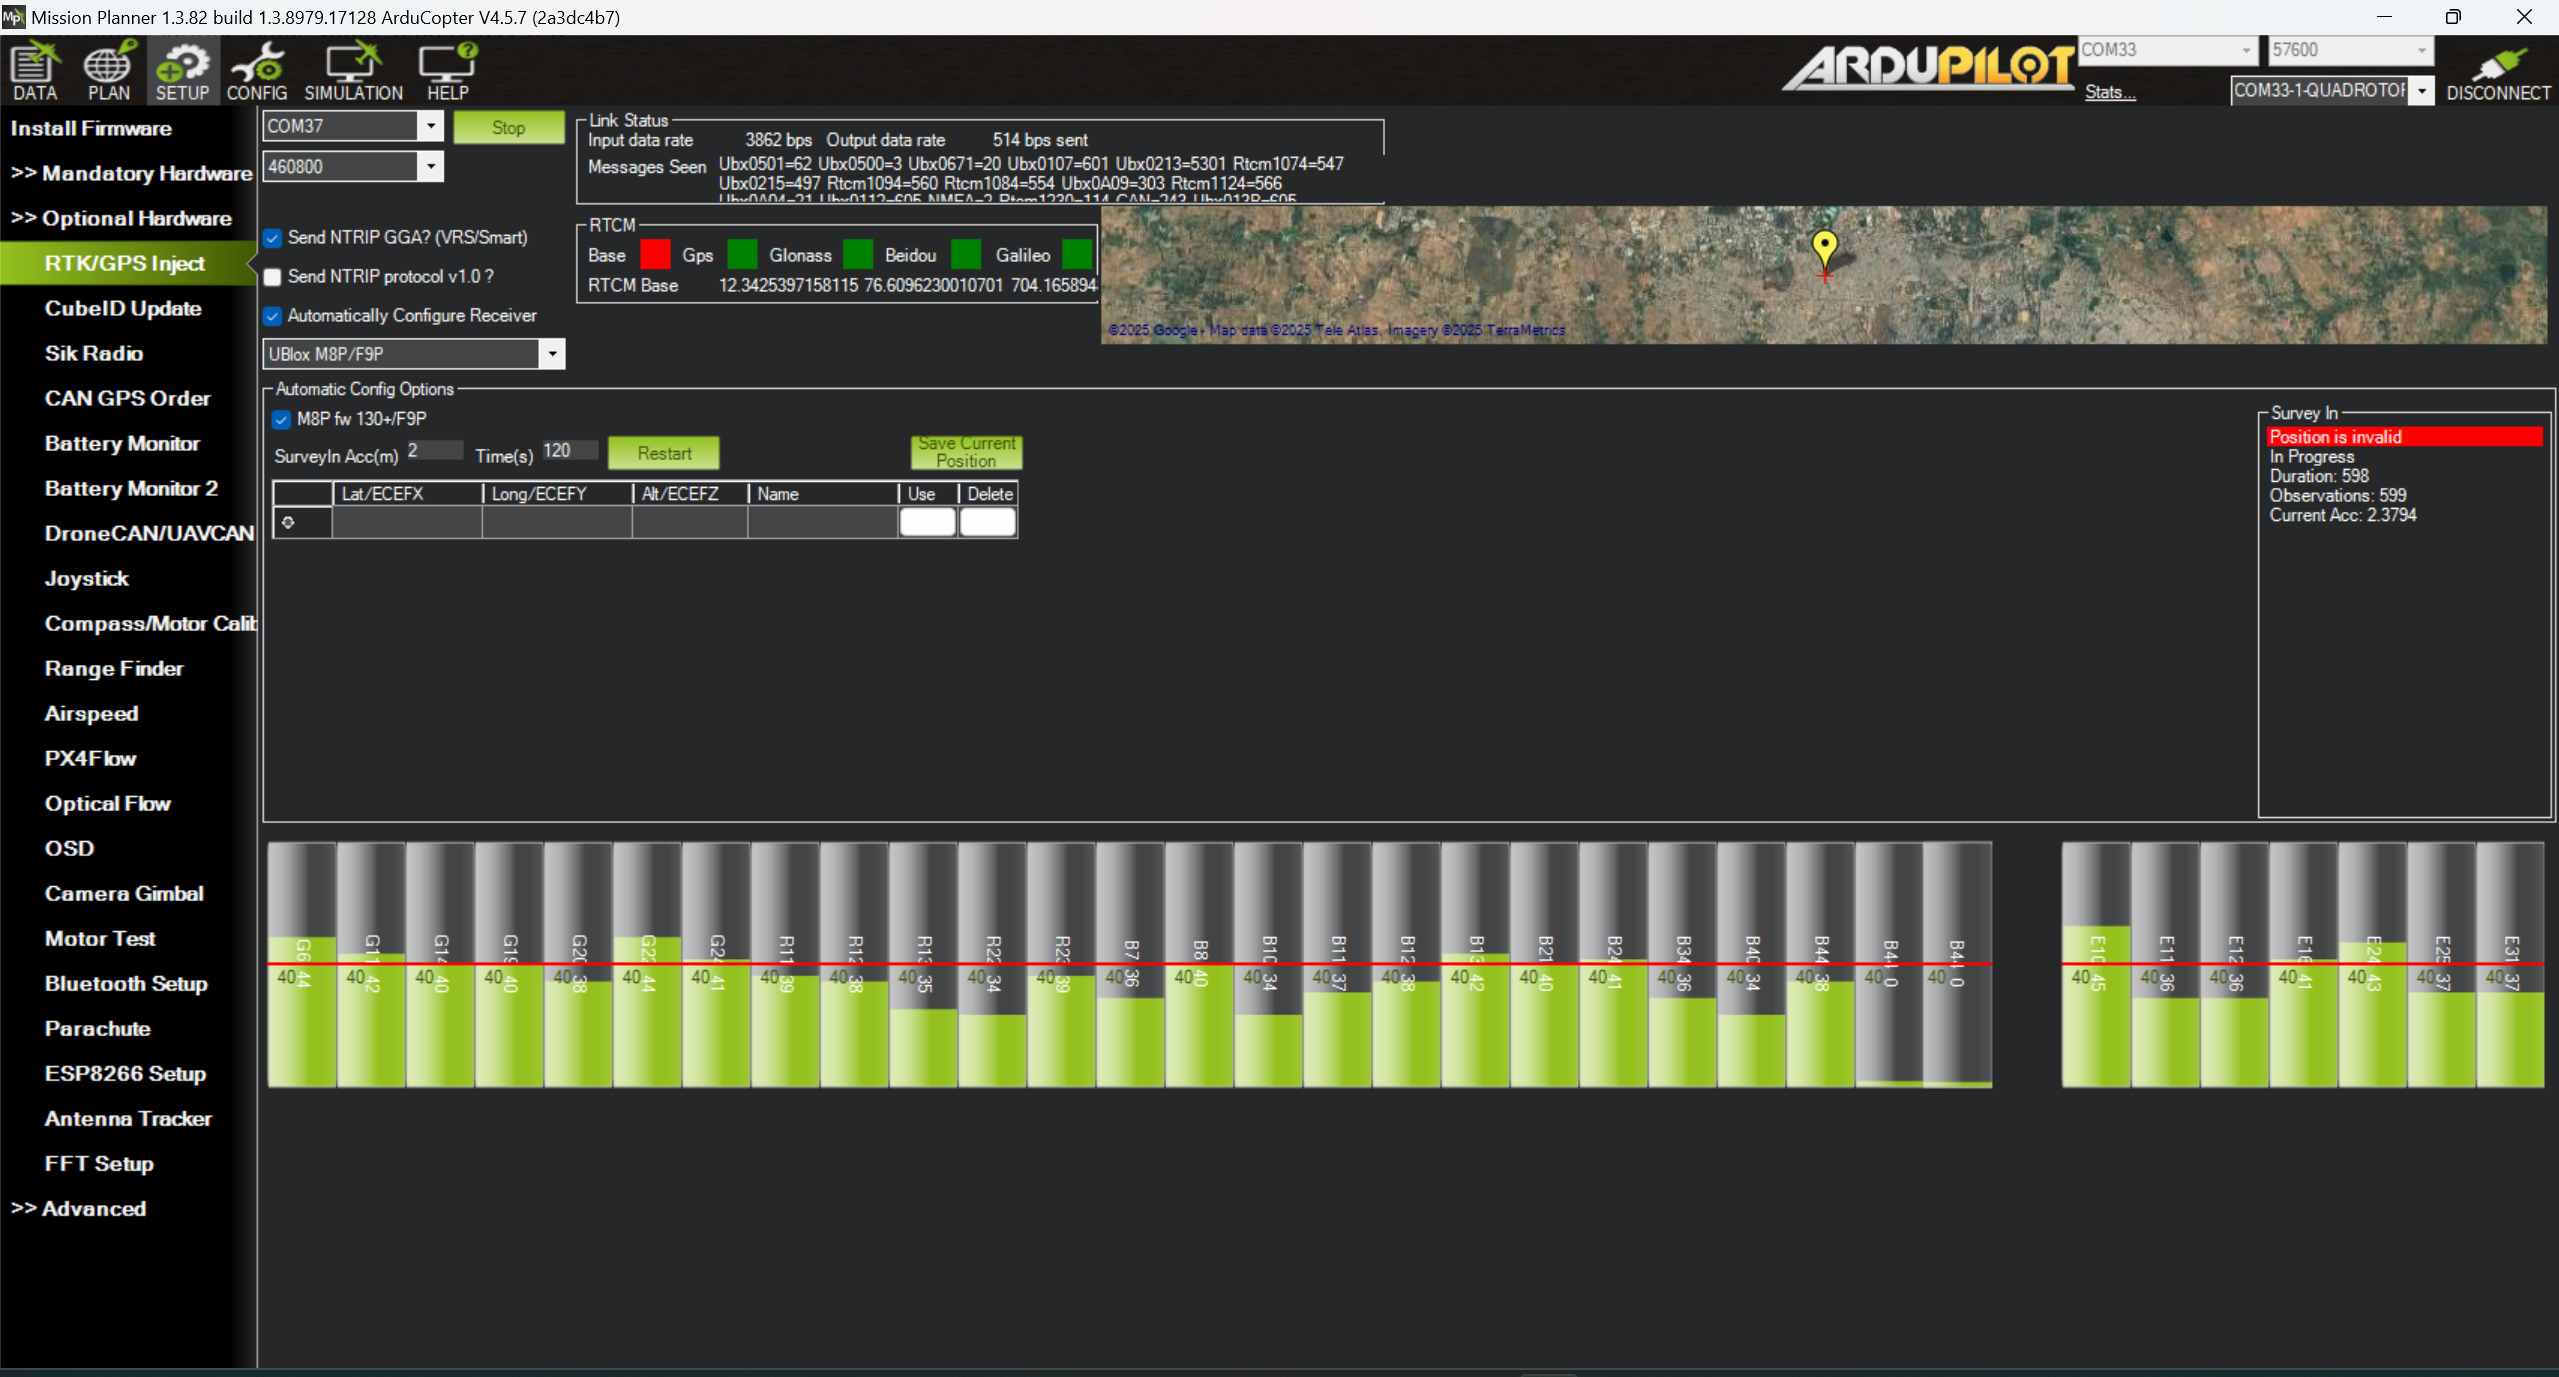
Step 4: Start the Base Station
- Once connected, Mission Planner will start receiving data from the Orbit Base. The base station’s position will be displayed on the map.
- The base needs to establish its own precise position. You have two options:
- Survey-In (Recommended for ease of use): The base will automatically average its position over time. A status message will show the current accuracy and duration. For good results, let it survey-in for at least 2-3 minutes, or until the displayed accuracy is under 1-2 meters.
- Fixed Position: If you know the exact coordinates of your base station from a previous survey, you can enter them manually for instant, repeatable accuracy.
- Once the base position is established and stable, Mission Planner will automatically begin broadcasting the RTCM correction data.

Step 5: Connect to Vehicle and Verify RTK Lock
- Now, connect Mission Planner to your vehicle using your standard telemetry link (e.g., SiK Radio, Wi-Fi, or USB).
- Mission Planner will automatically forward the RTK correction data from the base station to the vehicle over the telemetry link.
- On the main Flight Data screen, monitor the GPS status text in the HUD. It should change in the following sequence:
GPS: 3D Fix->GPS: RTK Float->GPS: RTK Fixed
RTK Fixedis the highest level of accuracy. The HUD will display “RTK Fixed” in green, and the satellite count will be high. You are now ready for high-precision operations.