
Orbit Neo Base Station RTK Setup
Base Station RTK Setup Guide
Overview
Using a dedicated RTK base station provides a local source of correction data for your Orbit Neo rover. This setup is ideal for operations where internet connectivity is limited or when you need complete control over your RTK system.
Requirements
- Orbit Neo GPS module (rover)
- Compatible RTK base station (not an Orbit Neo)
- Telemetry radio pair or other data link
- Mission Planner ground control software
- Clear sky view for both base and rover
Configure Orbit Neo as Rover
- Navigate to Config/Tuning > Full Parameter List
- Set the following parameters:
GPS_INJECT_TO: Set to0to enable GPS1 to receive RTK correctionsGPS_RATE_MS: Set to100for 10Hz update rate
Compatible Base Station Options
Choose any RTK-capable GNSS receiver that outputs RTCM3 corrections as your base station.
Base Station Setup
Physical Setup
- Mount the base station on a stable platform with clear sky view
- Ensure the base station is at least 2 meters above ground level
- Keep away from reflective surfaces and potential RF interference
- Connect the base station to power and a telemetry radio
Base Station Configuration
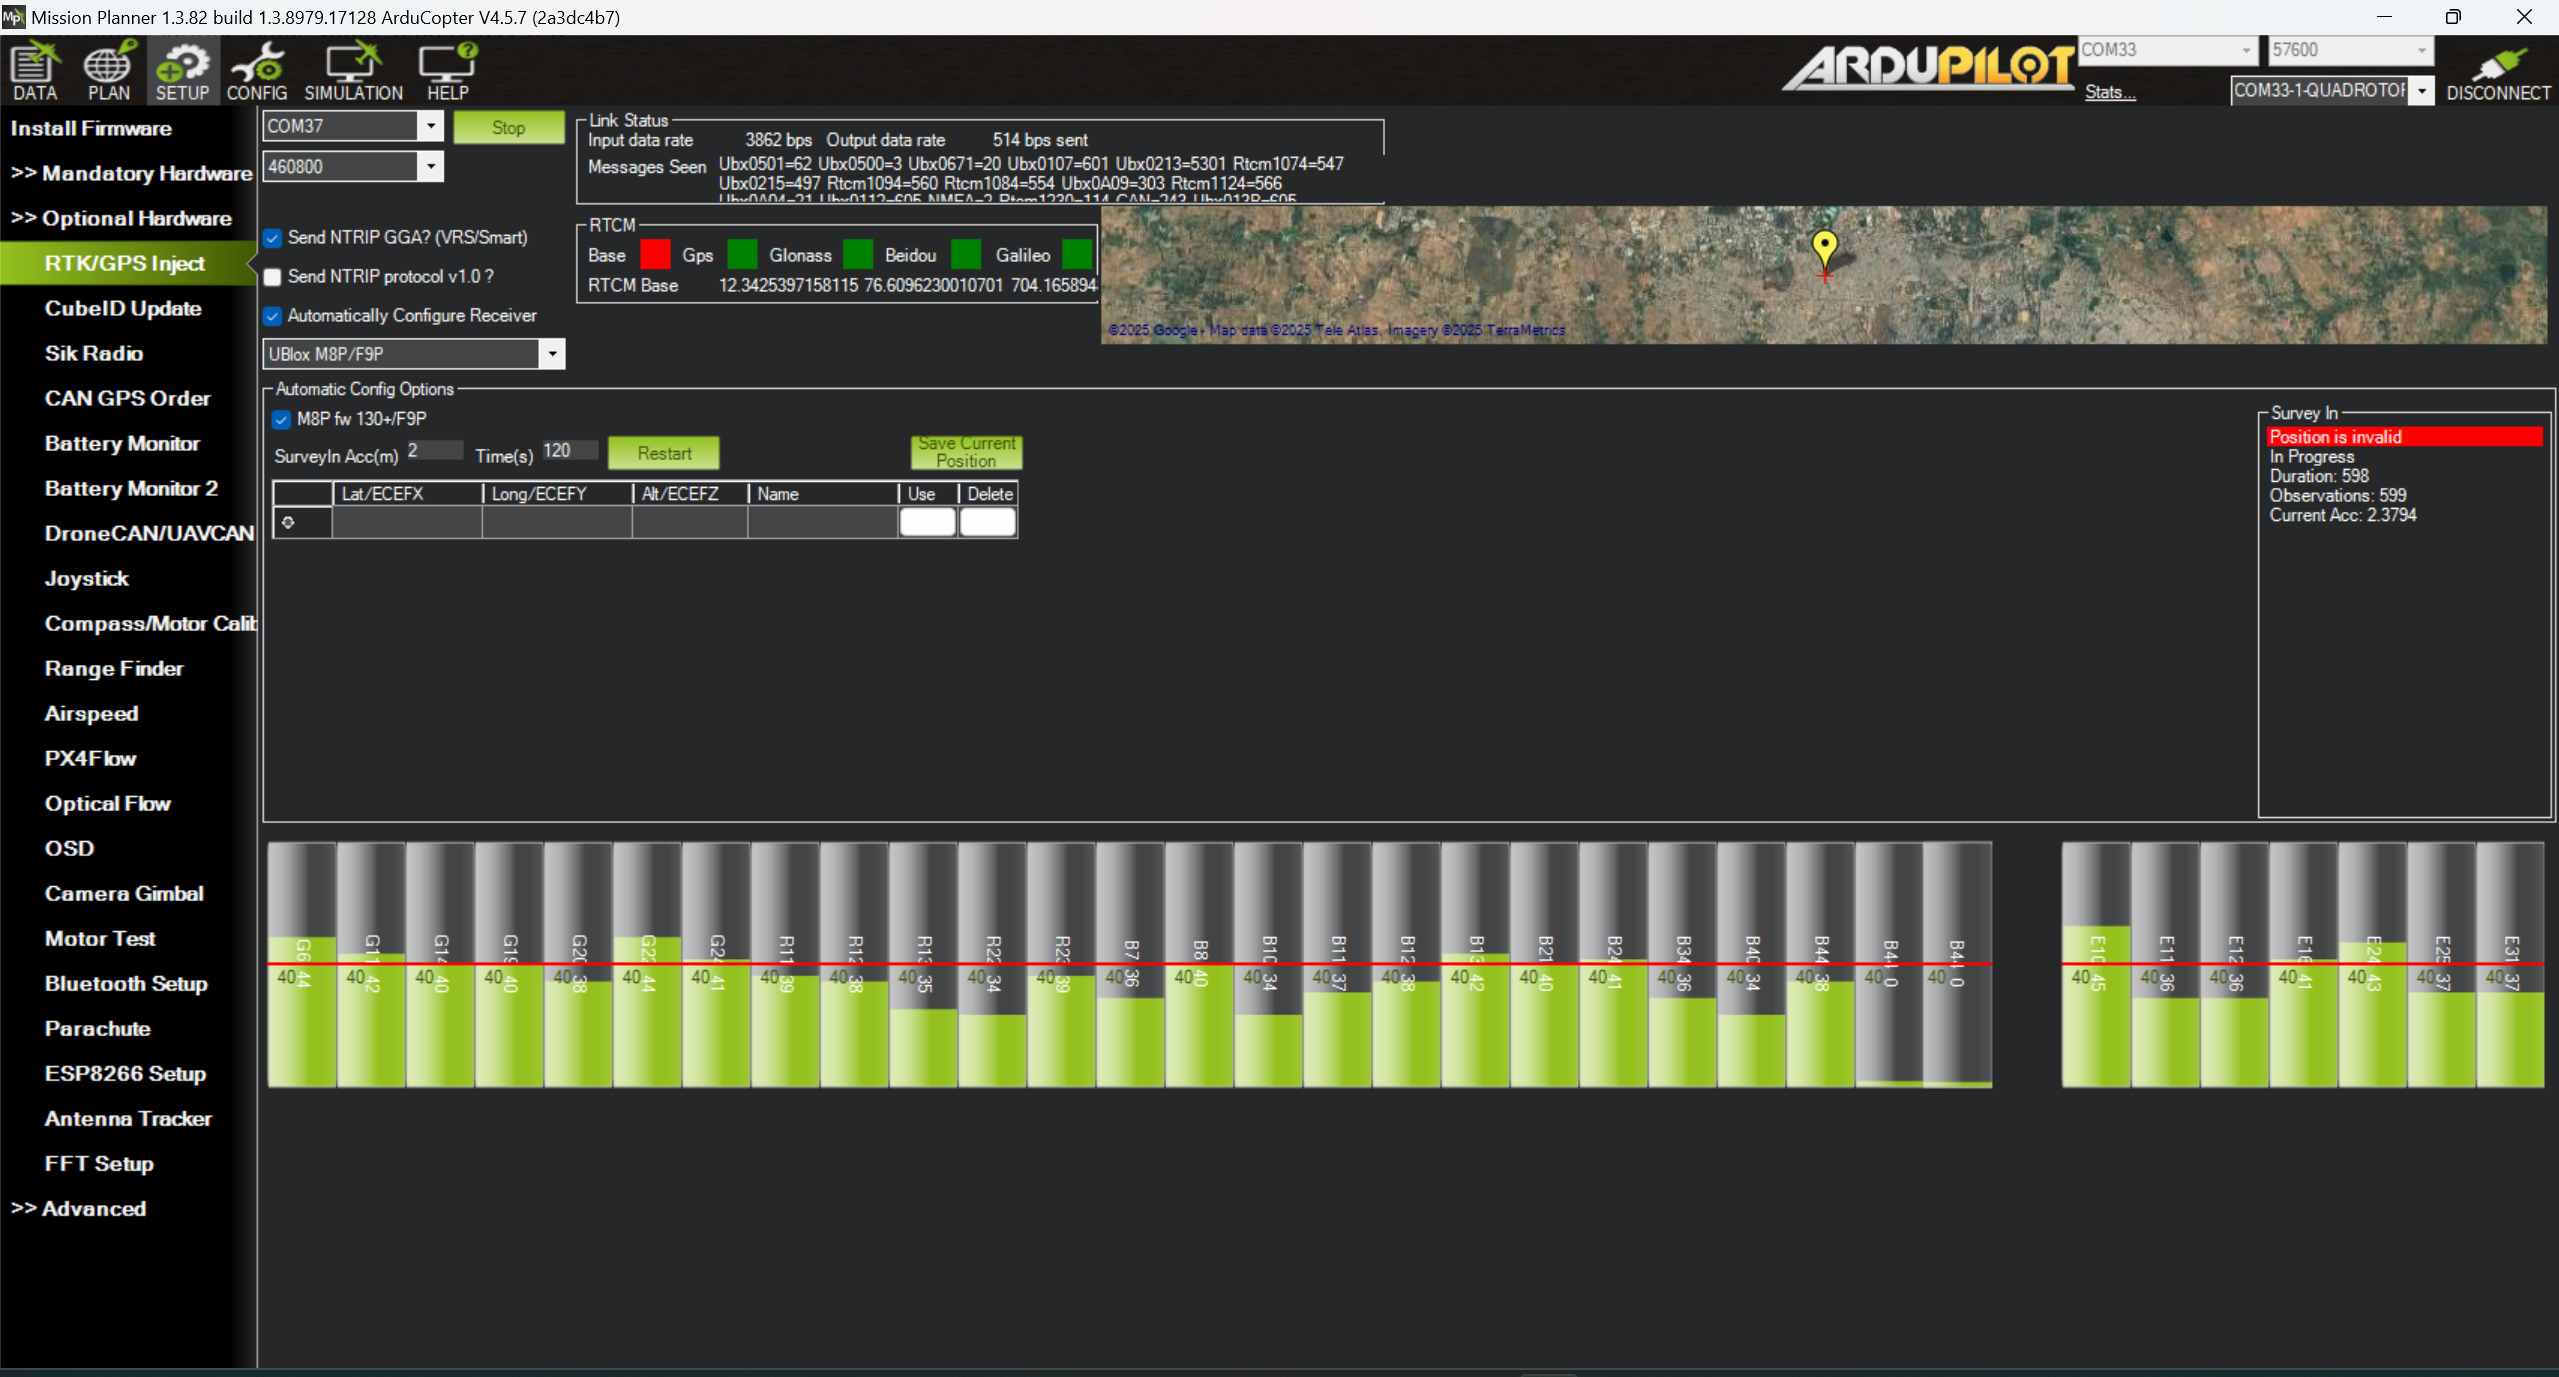
- After connecting the GPS base station to your PC, start Mission Planner
- Enter the COM port to which the base station is attached and press “Connect”
- Verify connection success:
- “Link Status” should show data being input
- Satellite constellations should appear with green indicators
- Press the “RESTART” button to begin the “survey-in” process
- Configure survey parameters:
- Set SurveyIn Acc(m): 2m is commonly used (Ublox recommends 5m or less)
- Set Time(s): Minimum duration for the survey
- Monitor survey status progress until “Position is Valid” is obtained
- Once the position is obtained, you can:
- Save it for future use to avoid repeating the survey procedure
- To reuse a saved position, ensure the base station is in the exact same location, then press the “USE” button for that saved location
Mission Planner will automatically configure the appropriate settings, including RTCM3 messages and survey-in parameters.

Verifying RTK Operation
Status Indicators
Check the RTK status indicator in the Mission Planner HUD:
- RTK Float: Initial convergence phase (indicates it’s using correction data but hasn’t moved to highest precision mode yet)
- RTK Fixed: Centimeter accuracy achieved (ready for use)
Performance Verification
- With RTK Fixed status, position hold accuracy should be within 10 cm
- Observe the satellite count and signal quality indicators
- Perform a short flight test to verify consistent positioning accuracy
Troubleshooting
| Issue | Solution |
|---|---|
| No RTK data received | Check telemetry connection and configuration |
| Corrections received but no RTK fix | Verify base station configuration |
| Float but not Fixed | Allow more time for convergence |
| Poor accuracy | Ensure base station has good satellite visibility |
Tips for Optimal Performance
- Place the base station with 360° unobstructed sky view
- Maintain telemetry link within recommended range
- Keep the base station in the same position during your entire operation
- For permanent installations, consider a fixed mount with known coordinates
- For extended operations, use a reliable power source for the base station
Advanced Configuration
For users requiring specialized configurations, additional parameters can be adjusted:
- Base station output rate
- RTCM3 message types
- Satellite constellation selection (GPS, GLONASS, Galileo, BeiDou)
Refer to your specific base station documentation for advanced configuration options.